Introduction to jQuery Part 2
Refresher
To include jQuery in your project, make sure you have the following lines of code before the closing </body> tag of your web page.
<script src="http://code.jquery.com/jquery.min.js"></script>
<script>
jQuery(document).ready(function($){


});
</script>
This includes the CDN copy of jQuery (you can also just download a copy to a folder and link to it) as well as sets up the jQuery ready function where your code will lie.
Parts of a jQuery method

The jQuery method is a way to activate some kind of action (a function). You can also include bits of data inside the parenthesis to tell the method how to run.
jQuery Plugins
It’s important to load jQuery plugins after you load the jQuery library. Below is an example of loading in the Fancybox, Event, and Twenty-Twenty plugins.
<script src="http://code.jquery.com/jquery.min.js"></script>
<!-- Plugins loaded below -->
<script src="jquery.fancybox.pack.js"></script>
<script src="js/jquery.event.move.js"></script>
<script src="js/jquery.twentytwenty.js"></script>
Plugins usually create new methods you can use in jQuery, and perform new actions.
//Methods built into jQueyr

$(".mybox").fadeOut();
$(".mybox").hide();
$(".mybox").css("color","#0000ff");

//new method included by jQuery
$(".mybox").twentytwenty();
Twenty-twenty plugin (before and after plugin)

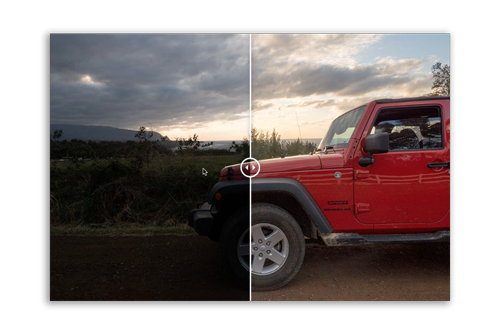
The Twenty-Twenty plugin allows you to create features where you can slide over a photos to reveal another photo. The documentation on their website describes how this works:
<div id="before-and-after">
  <img src="sample-before.png">
  <img src="sample-after.png">
</div>
...
<script>
$("#before-and-after").twentytwenty();
</script>
Remodal plugins (the pop-up window)
The Remodal plugin allows you to create small pop-up windows easily. These windows are often called “modals” in web parlance. Some plugins, like the remodal plugin, don’t require jQuery code. They setup the page automatically and are triggered using data attributes. Data attributes are arbitrary attributes you can put on HTML elements, as long as they start with data- (followed by a dash and the name of the attribute). An example would be data-modal.
Their online documentation describes how to implement the plugin. The actual files can be downloaded here.
<!-- include the css files in the head of your document -->
<link rel="stylesheet" href="remodal.css">
<link rel="stylesheet" href="remodal-default-theme.css">

...

<!-- include the plugin AFTER jquery library -->
<script src="remodal.min.js"></script>
To implement the plugin, you need two sets of HTML tags. The actual modal (pop-up window) won’t display until the button is clicked.
<div class="remodal" data-remodal-id="modal">
  <button data-remodal-action="close" class="remodal-close"></button>
  <p>My pop-up window! Don't annoy users!</p>
</div>

<a data-remodal-target="modal">Trigger the window</a>
Notice how the data-remodal-id attribute matches what’s in the button. That’s how it knows which pop-up to show in cases when you have multiple.
jQuery Cycle Slideshow
jQuery Cycle 2 is a simple slideshow plugin that allows you to create slideshows without JavaScript. Much like the remodal plugin, you just have to add the appropriate data attributes. The jQuery Cycle2 plugin can be downloaded here from their website.

They also have a webpage explaining how to run the cycle plugin.
Just by adding the class cycle-slideshow, it will take all of the HTML elements one level down and turn them into a slideshow.
<div class="cycle-slideshow">
    <img src="http://malsup.github.io/images/p1.jpg">
    <img src="http://malsup.github.io/images/p2.jpg">
    <img src="http://malsup.github.io/images/p3.jpg">
    <img src="http://malsup.github.io/images/p4.jpg">
</div>
You can also use data attributes to control the effect of the slideshow.
<div class="cycle-slideshow"
    data-cycle-fx="scrollHorz"
    data-cycle-timeout="0"
    data-cycle-prev="#prev"
    data-cycle-next="#next"
>
        <img src="http://malsup.github.io/images/p1.jpg">
        <img src="http://malsup.github.io/images/p2.jpg">
        <img src="http://malsup.github.io/images/p3.jpg">
        <img src="http://malsup.github.io/images/p4.jpg">
</div>
Note how the data attributes are stacked above. This is a common convention when there are many attributes in a tag; it makes it easier to see and understand.
Video Tag
<video poster="assets/traffic.png">
    <source src="assets/traffic.mp4" type="video/mp4">
    <source src="assets/traffic.ogv" type="video/ogg">
    <img src="assets/traffic.png" alt="Traffic">
</video>