Intro to CSS
Thinking about Web pages as a collection of boxes
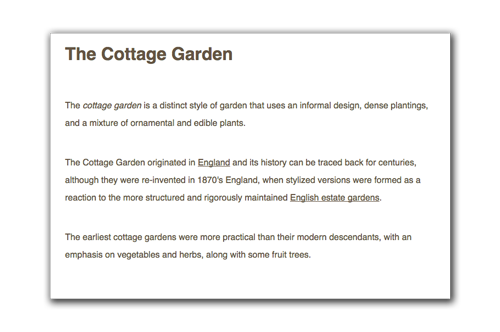
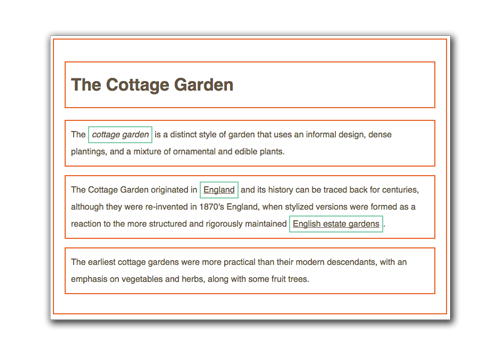
When you look at a web page, it’s important to start thinking about how it was constructed. Every web page is designed as a series of boxes within boxes. As you learn the different HTML tags, you’ll start to understand how web pages are built and the order of the HTML tags that make up a page.
Inline vs Block
Some HTML elements will start a new line in the browser and others run side-by-side like words in a sentence. It’s important to distinguish the differences between inline elements and block elements and how they display on the page.
Block elements
By default block elements take up the full width of the browser, even if the content of the tag doesn’t reach that far.
<h1>This h1 tag is a block element</h1><p>This p tag will display on a new line</p>
And this is how it would appear in a browser (added background shade for effect):
This h1 tag is a block element
This p tag will display on a new line
When displayed in the browser, this <ht> tag will display on its own line, even if the text doesn’t reach all the way to the end. You have to image an invisible box around it that spans the entire width the browser.
Inline Elements
Conversely, inline elements run side-by-side and will flow similar to text. If there isn’t enough room for them to run side-by-side, they will automatically continue onto the next line like words in a sentence do.
<strong>This is an inline element. </strong><span>This is also inline, and won't show on a second line unless it runs out of room, then it will continue to the next line.</span>
This is how it would appear in the browser
These are a few block and inline elements. The most counter-intuitive one is probably the img tag, which is inline be default, but often people intend to use it to break apart text.
| Block elements | Inline elements |
|---|---|
| div | span |
| h1 | a |
| p | img |
| ul | strong |
| li | em |
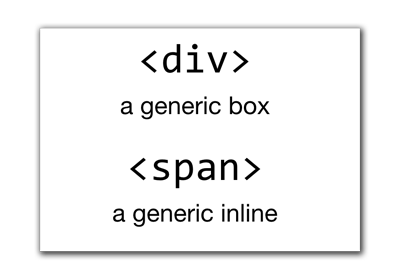
There are two elements that you should also know about. These are generic elements which allow you to quickly create inline or block items for design purposes. Ideally, you should use something with more semantic meaning, but these come in handy from a purely visual standpoint.
Parts of a CSS Rule
Before we get into new selectors, it’s important to review the parts of the CSS rule.
The Selector
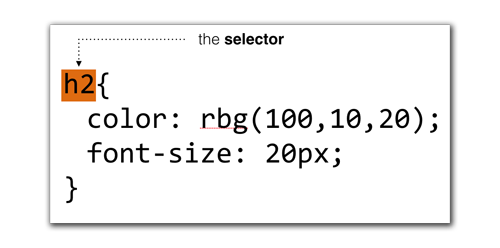
This is the part that defines what html tag(s) will be affected by the rule. There are many different ways to format the selector to pick out different tags. This tutorial will cover all of them.
Properties
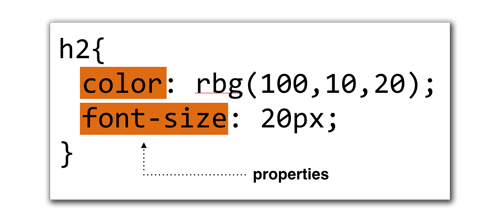
These are a pre-defined set of properties that can be affected by the CSS rule. We can change things like the text size, font, background color, or add a border.
Values
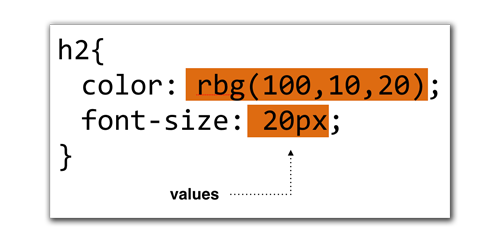
These are values that we can assign to the properties. Each property can only take values of a certain format, or unit of measure (i.e. pixels or fonts).
Comma-separated Selectors
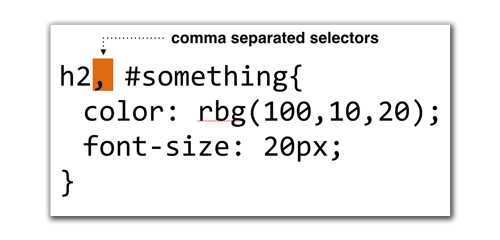
As a shortcut, you can comma-separate multiple selectors, and the CSS rule will be applied to teach selector. This is no different than repeating the rule for each selector; it’s just a shorthand way of doing this.
Space-separated Selectors (Descendant Selector)
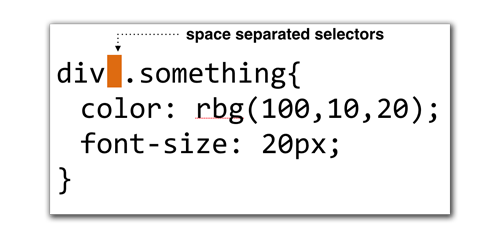
When selectors are separated by a space, it indicated that only certain HTML elements nested inside other elements will be affected. These are called descendant selectors because they only affect descendants. In this image example, only HTML elements with class="something" will be affected, but only if they are nested inside a <div> tag.
New Types of Selectors
| Selector | Name | Function |
|---|---|---|
| * | Universal Selector | Affects all HTML elements in your entire document. |
| h1, h2, h3 | Type Selector | Matches to elements of specified name, regardless of where they are. |
| .note | Class Selector | Matches any number of elements with a class attribute of the same name. |
| #introduction | ID Selector | Matches only one element that has an id attribute of the same name. |
| li > a | Child Selector | Matches elements that are one-level direct descendant of the other. |
| p a | Descendant Selector | Matches elements at any level below the first listed selector. |
| h1 + p | Adjacent Sibling Selector | Matches elements that come directly after another (on same level). |
| h1 ~ p | General Sibling Selector | Matches elements at the same level as the previous selector. |
The Cascade
CSS stands for Cascading Style Sheets, and there is a reason why. The language is built on the idea that there will be conflicts among the different rules. Like with the general selector, which affects all HTML tags in your document, you can override earlier rules.
The cascade refers to a set of parameters whereby one rule overrides another. Here are the general parameters:
- Last Rule: If two identical rules are setup with the same weight, the one that comes last wins out.
- Specificity: If one selector is more specific, it wins out (even if it comes before another).
- !Important: Use this as a last resort. You can override individual styles with an
!importantdeclaration at the end of the property, but before the semicolon close.
/* Let's say we want to override the font size.*/
h2{
    color: rbg(100,10,20);
    font-size: 20px !important;
}
Note we added !important to the end of the font-size property, which places it at the head of the line in terms of weight. This will override all other rules affecting the font-size of h2 tags (unless there is another !important after it that conflicts, in which case the last rule is in effect).
CSS Colors
CSS Colors can be specified in several ways. The two most popular are RGB and hexidecimal.
RGB Values
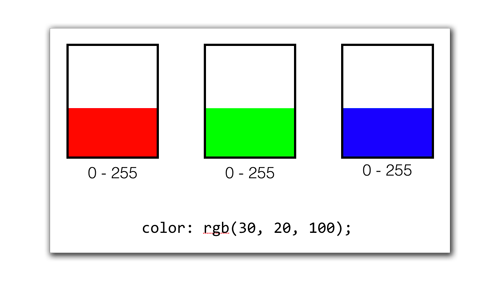
RGB stands for Red, Green, and Blue. You can think of these colors as three paint buckets, and by filling them at different levels, they mix to form any number of 16 million different color combinations. The levels are specified as a value from 0 (white) to 255 (solid).
div{
    background-color: rgb(0, 0, 0);       /* black */
    background-color: rgb(255, 255, 255); /* white */
    background-color: rgb(255, 0, 0);     /* red */
    background-color: rgb(0, 255, 0);     /* green */
    background-color: rgb(0, 0, 255);     /* blue */
    background-color: rgb(100, 100, 100); /* gray */
}
Hexadecimal Values
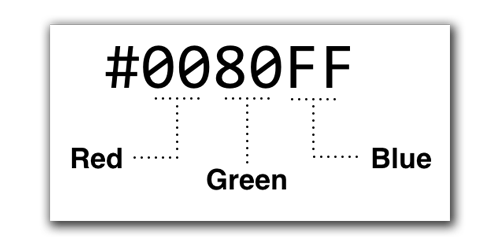
Any base 10 decimal number can be converted to a hexadecimal (base 16) value through a simple formula. Each color is converted into a two-character hex equivalent. This allows for a slightly shorter code when typing colors. Hexadecimals values can only be 0-9 and include the letters A-F. They are not case sensitive.
Exercise
This is a sample boilerplate HTML file we will use for the in-class exercise:
<!DOCTYPE html>
<html>
<head>
    <meta charset="utf-8">
    <title>Intro to Coding Interactives</title>
    <style>


    </style>
</head>
<body>


</body>
</html>
And we will be using this CSS Reset:
html, body, div, span, applet, object, iframe, h1, h2, h3, h4, h5, h6, p, blockquote, pre, a, abbr, acronym, address, big, cite, code, del, dfn, em, font, img, ins, kbd, q, s, samp, small, strike, strong, sub, sup, tt, var, b, u, i, center, dl, dt, dd, ol, ul, li, fieldset, form, label, legend, caption {
    margin: 0;
    padding: 0;
    border: 0;
    outline: 0;
    font-size: 100%;
    vertical-align: baseline;
    background: transparent;
}
Homework Assignment
Recreate the opening two sections of this example using the assets provided below. Put them into a single .html file, then submit on bCourses before the next class.

Direct link to the background image for the above screenshot
