Workflow and Github
Creating a GitHub Page
This lesson will take you through the process of creating a Github website that runs on the Jekyll site generator. For class, we’ll use this to host the projects you build throughout the semester. You’ll also use this as a way to turn in your assignments.
Some Git Terms Explained
- master - This is the main branch of your repository. It is the default branch if you don’t create any others.
- clone - This is a way to copy a repository from a remote location (i.e. GitHub.com) to your local computer.
- commit - To set a version (i.e. save point) for your project. You can review these commits, and see the changes that were made.
- push or sync - If you have a copy of the repository on your local computer, the sync process will sync it with the server.
- head - This is a reference to the node the repository currently points. Think of head as the latest node by default. You can change the head to previous revision, for example.
- branch - This allows you to create a new version of your repository separate from the master branch. As you switch back and forth, the files on your computer are automatically modified to reflect those changes.
- fork - A way to make a copy of a repository. You can fork anyone’s code on GitHub.com to make your own version of their code.
- pull request - This is when you make changes to someone else’s repository (after forking it), and you submit a request for them to incorporate your changes into their codebase.
- merge conflict - When the same area of a file differs, or is in conflict with another change. It will add some notations of where the conflicts are, and you have to resolve these before proceeding.
Setting up a GitHub repository and Page
Step 1
Create a GitHub account with your e-mail address. Make sure you confirm your e-mail address to complete the account setup. NOTE: The username you choose will be public and will be part of the URL of the website we’ll have you build.
Step 2
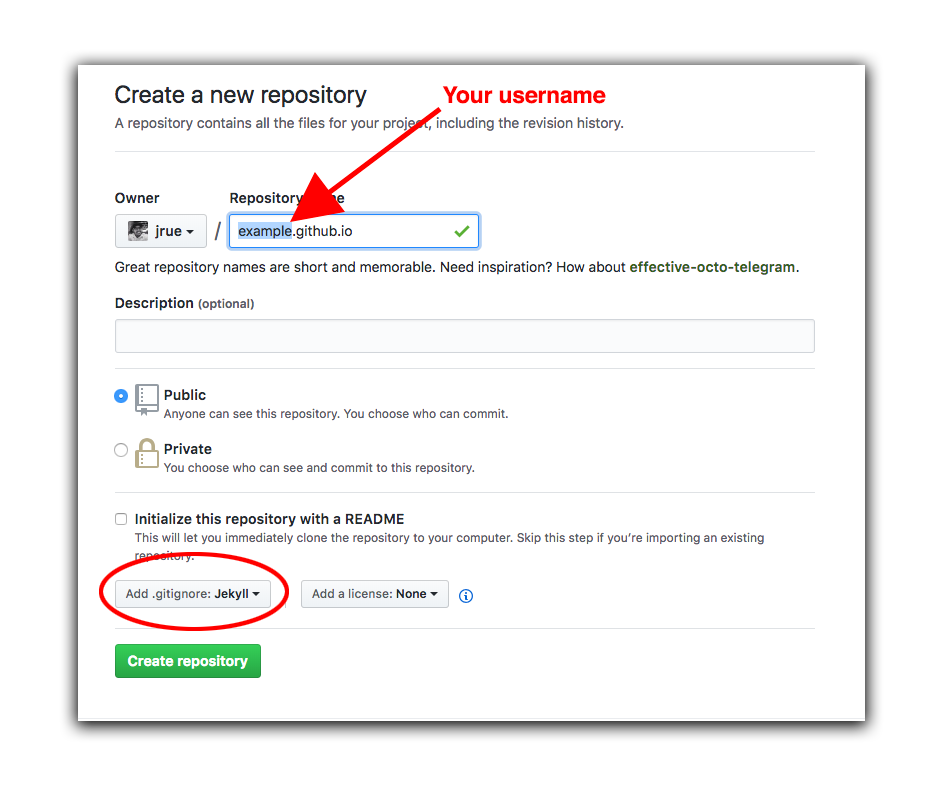
Create a new repository by clicking on the plus arrow at the right-hand top corner of the screen.
![]()
For the new repository, make sure to specify the repository name as yourusername.github.io. Under the “Add .gitignore” option, choose “Jekyll.”
Step 3
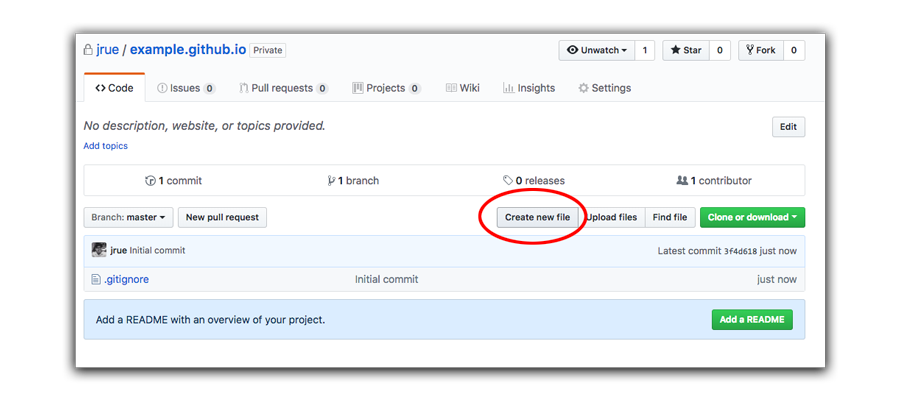
Create a new file in your repo, and call is _config.yml (don’t forget the underscore at the beginning).
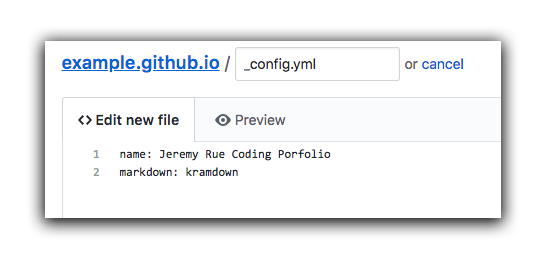
Inside the _config.yml file, put the following text, except change the name to your own.
name: Jeremy Rue Coding Porfolio
markdown: kramdown
Step 4
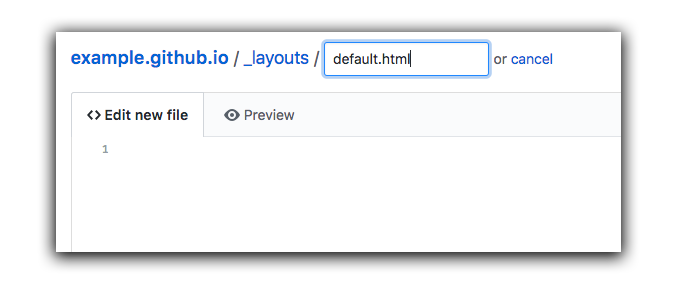
Next, we’ll create a _layouts directory (i.e. folder) with a file in it called default.html. We can do this at the same time by specifying the directory in conjunction with the file.
Click the create a new file button like we did in the previous step. But type the name _layouts with an underscore at the beginning.
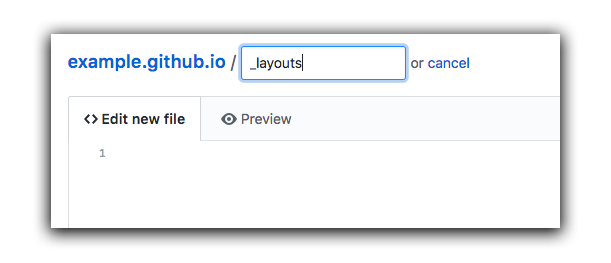
Before clicking enter, type a forward slash, and Github will automatically tab over to a new text box. Type in default.html
For the file content, paste in the following page:
<!doctype html>
<html lang="en">
  <head>
    <meta charset="utf-8">
    <meta name="viewport" content="width=device-width, initial-scale=1, shrink-to-fit=no">
    <link rel="stylesheet" href="https://stackpath.bootstrapcdn.com/bootstrap/4.1.3/css/bootstrap.min.css" integrity="sha384-MCw98/SFnGE8fJT3GXwEOngsV7Zt27NXFoaoApmYm81iuXoPkFOJwJ8ERdknLPMO" crossorigin="anonymous">

    <title>{{ page.title }}</title>
  </head>
  <body>
    <div class="container">
        <header class="jumbotron text-center d-flex justify-content-center align-items-center flex-column">
            <h1 class="display-4">{{ page.title }}</h1>
            <p class="lead">Coding class portfolio</p>
        </header>

        {{ content }}

    </div>
    <script src="https://code.jquery.com/jquery-3.3.1.slim.min.js" integrity="sha384-q8i/X+965DzO0rT7abK41JStQIAqVgRVzpbzo5smXKp4YfRvH+8abtTE1Pi6jizo" crossorigin="anonymous"></script>
    <script src="https://cdnjs.cloudflare.com/ajax/libs/popper.js/1.14.3/umd/popper.min.js" integrity="sha384-ZMP7rVo3mIykV+2+9J3UJ46jBk0WLaUAdn689aCwoqbBJiSnjAK/l8WvCWPIPm49" crossorigin="anonymous"></script>
    <script src="https://stackpath.bootstrapcdn.com/bootstrap/4.1.3/js/bootstrap.min.js" integrity="sha384-ChfqqxuZUCnJSK3+MXmPNIyE6ZbWh2IMqE241rYiqJxyMiZ6OW/JmZQ5stwEULTy" crossorigin="anonymous"></script>
  </body>
</html>
Note that this template has both {{ page.title }} and {{ content }} tags embedded. These tags represent placeholders that will become content later on.
Step 5
Next, let’s create an index.html page at the root of our folder. This will be the main page that users will see. However, we’re going to use our Jekyll markup code to dynamically create part of the page.
First, go back to the root folder:
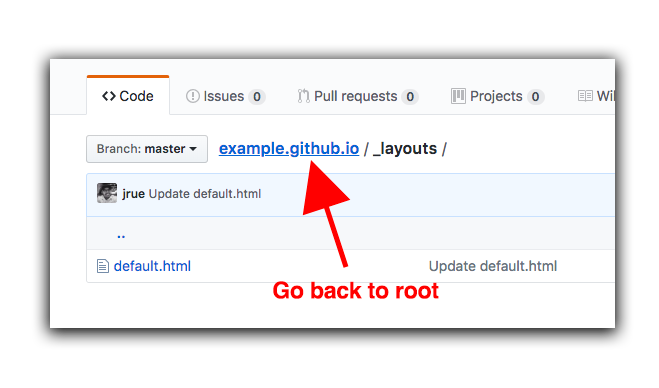
Create a new file, just like you did in the earlier steps. Name the file index.html.
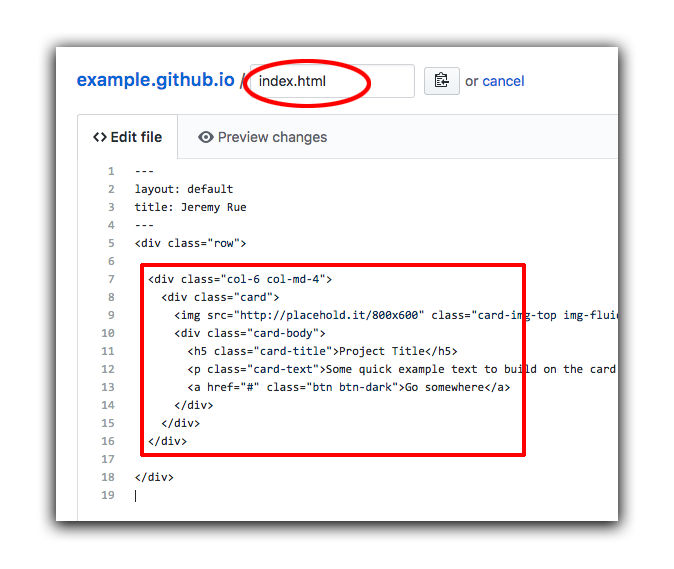
And paste in the following code for the content:
---
layout: default
title: Jeremy Rue
---
<div class="row">

  <div class="col-6 col-md-4">
    <div class="card">
      <img src="http://placehold.it/800x600" class="card-img-top img-fluid d-block" alt="placeholder">
      <div class="card-body">
        <h5 class="card-title">Project Title</h5>
        <p class="card-text">Some quick example text to build on the card title and make up the bulk of the card's content.</p>
        <a href="#" class="btn btn-dark">Go somewhere</a>
      </div>
    </div>
  </div>

</div>
Step 6
You can preview your site at https://[YOUR USER NAME].github.io The code block from above includes one item for a project in your portfolio.
Wouldn’t be amazing if we used some code to generate those project blocks for each project we do in class?
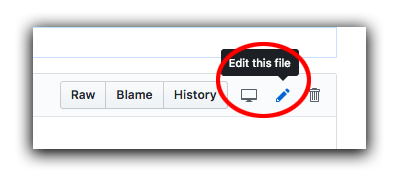
Let’s edit the index.html file, and make a few modifications. We’re going to add some code called “front matter” at the top of the document in a structured format. We’ll use this structure to auto generate the project boxes below. This will allow us to easily add projects throughout the class by easily just adding some front matter.
Click on the edit pencil icon:
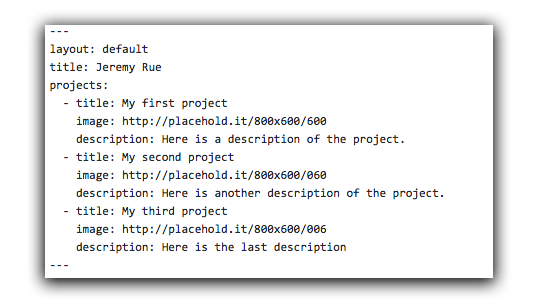
For the first part, we’re going to edit the front matter to include some data on each project. This markdown language is called YAML.
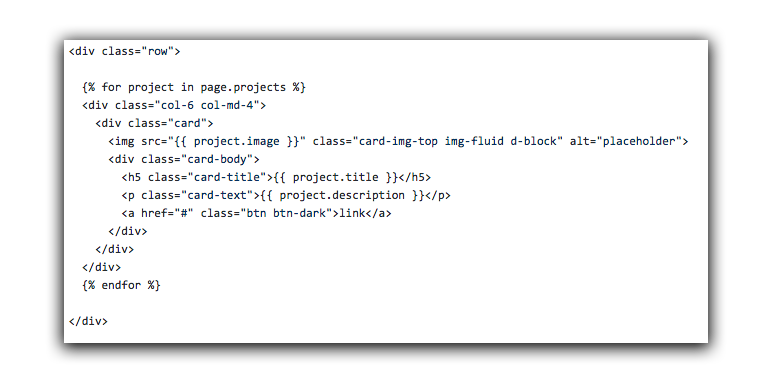
Next, we’ll modify the template to read the front matter. We’ll use special tags called liquid tags to read the front matter code, and use it in our template below.
Here is the full code you can also copy-and-paste:
---
layout: default
title: Jeremy Rue
projects:
  - title: My first project
    image: http://placehold.it/800x600/600
    description: Here is a description of the project.
    link: #
  - title: My second project
    image: http://placehold.it/800x600/060
    description: Here is another description of the project.
    link: #
  - title: My third project
    image: http://placehold.it/800x600/006
    description: Here is the last description.
    link: #
---
<div class="row">

  {% for project in page.projects %}
  <div class="col-6 col-md-4">
    <div class="card">
      <img src="{{ project.image }}" class="card-img-top img-fluid d-block" alt="placeholder">
      <div class="card-body">
        <h5 class="card-title">{{ project.title }}</h5>
        <p class="card-text">{{ project.description }}</p>
        <a href="{{ project.link }}" class="btn btn-dark" target="_blank">Link to Project</a>
      </div>
    </div>
  </div>
  {% endfor %}

</div>
The page proprty has all of the front matter. For example,
page.layoutwill be “default”page.titlewill be “Jeremy Rue” (in the example below)page.projectswill be multiple items stored in a unique format that we can access one-by-one.
The code {% for project in page.projects %} is a loop that will go through each project individually, and assign that project to the word “project” (wihtout the plural). Then, inside our template, we can tell it to output project.title and project.description.
Using a Jekyll on your local computer
NOTE: We won’t do this in class. I kept these notes here for more advanced uses, and for those who might want to run Jekyll locally on their machine.
You first have to install two programs: Jekyll and Bundler. These are easy, since Macs come with a package installer called RubyGem, or “gem” for short.
brew install rbenv ruby-builds
Once that completes, add a command so that rbenv launches every time you launch Terminal.
echo 'if which rbenv > /dev/null; then eval "$(rbenv init -)"; fi' >> ~/.bash_profile
source ~/.bash_profile
Next, update you local copy of Ruby:
rbenv install 2.4.1
rbenv global 2.4.1
Next Install Bundler.
gem install bundler
Navigate to where you want to setup your website. One potential location is ~/Sites directory.
git init your_name_portfolio
Next, you need to cd into the directory that was just created.
cd your_name_portfolio
Create a Gemfile with the appropriate Jekyll source.
nano Gemfile
Then copy the following text, and paste it into the editor. After that, press Control + X to exit, and it will ask you to save. Press Y for Yes, and it will then ask you to verify the filename. Press enter to confirm.
source 'https://rubygems.org'
gem 'github-pages', group: :jekyll_plugins