Python (Jupyter) Notebooks
Installing HomeBrew
The first step to getting setup with Python notebooks is to install Homebrew. Homebrew is a program that you install via the command line (Terminal program on your Mac) and it will allow you to install other software easily with just a few commands. Homebrew is called a package installer.
When you visit the Homebrew website, copy and paste the command into your Terminal. Generally, you never want to do this with any website you don’t completely trust.
When installing Homebrew, it will ask you for your computer’s admin password. This is the only time Homebrew asks for this info. After you install it, all other software is sandboxed in special locations to prevent malware.
Xcode Commandline Tools
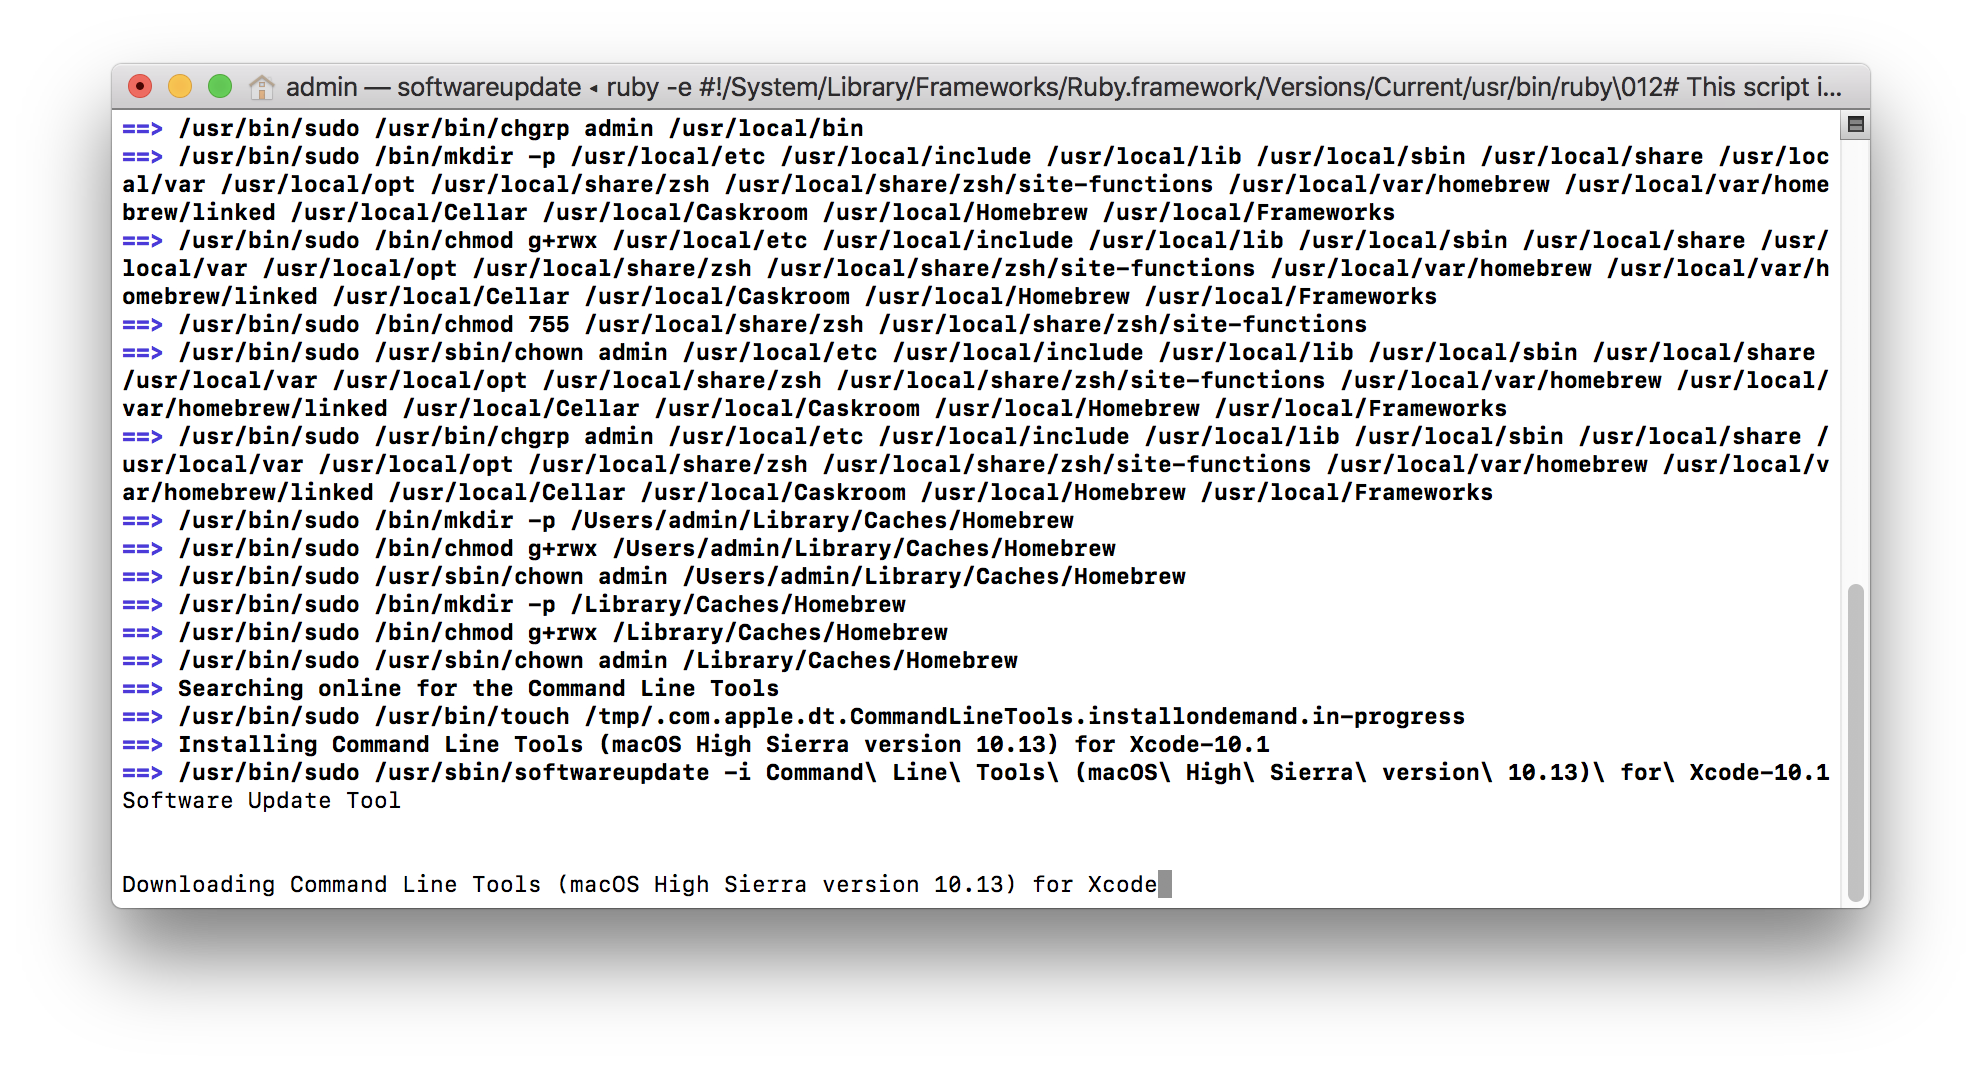
During its installation, Homebrew might ask about Xcode Commandline Tools software. Simply follow the prompts to agree to the user agreement to continue.
Installing Python3 on a Mac
If you’re using a Mac, the next step is to install Python3, which also installs a separate Python-specific package installer called pip3. We will use this in this lesson.
brew install python3
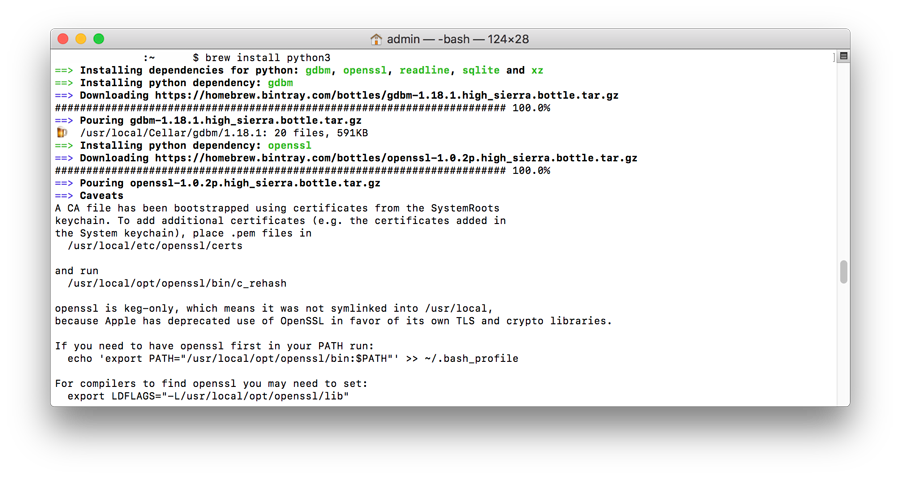
This will install Python3 on your computer. (Macs already come with an older version of Python. This won’t replace it, but install it in a unique location so that both can coexist.)
Install VirtualEnv
The next step is to install a piece of software called Virtual Enviornment. This allows you to create a sandbox program on your computer where you can install specific Python packages that are unique to any given project, without having to install them on your whole computer. This is common practice.
pip3 install virtualenv
Now that we have Virtual Environment installed, we should create a folder and navigate to that folder using the terminal. This next part of the tutorial will have you create a folder on your Desktop.
mkdir ~/Desktop/python_notebook
cd ~/Desktop/python_notebook
virtualenv .
This will create a Virtual Environment in this folder. To activate the Virtual Environment, type:
source bin/activate
This will change your prompt, indicated you’re inside the Virtual Environment.
Installing Jupyter Notebook
Next, let’s install the software we will need to run our notebook.
pip3 install jupyter pandas matplotlib
This will install three pieces of software and their dependencies: Jupyter Notebooks, Pandas data library, and a visualization library called MatPlotLib.
Next, let’s launch our Python Notebook:
jupyter notebook
This should launch Jupyter Notebook in your browser window.
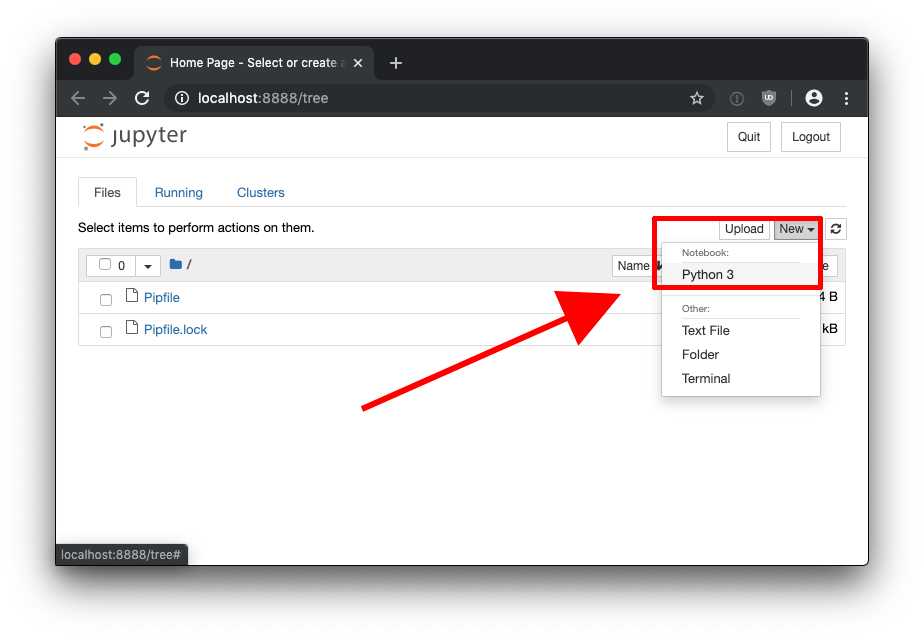
Click on the new button, and select Python3 from notebooks.
From this page, you can input commands in each cell, and press shift + return to run a command.
Using BeautifulSoup as a web scraper
Python has a library called BeautifulSoup that can scrape websites for data. We can install this and test it out. First, launch your virtual environment from a working folder on your computer.
mkdir ~/Desktop/python_scraper
cd ~/Desktop/python_scraper
virtualenv .
source bin/activate
Now that you’ve launched your virtual environment, we’ll install Jupyter notebook, along with BeautifulSoup and a few other programs we will use.
Using the pip3 command described earlier, we’re going to install the following libraries:
pip3 install jupyter bs4 requests numpy
- jupyter - This is the Jupyter notebook program so we can run commands interactively in the web browser.
- bs4 - This is the BeautifulSoup4 program
- requests - This is a software program for fetching external webpages, so we can analyze them.
- numpy - This is a software program for running various data analysis commands.
Next, let’s launch a new notebook, and import the libaries we will use.
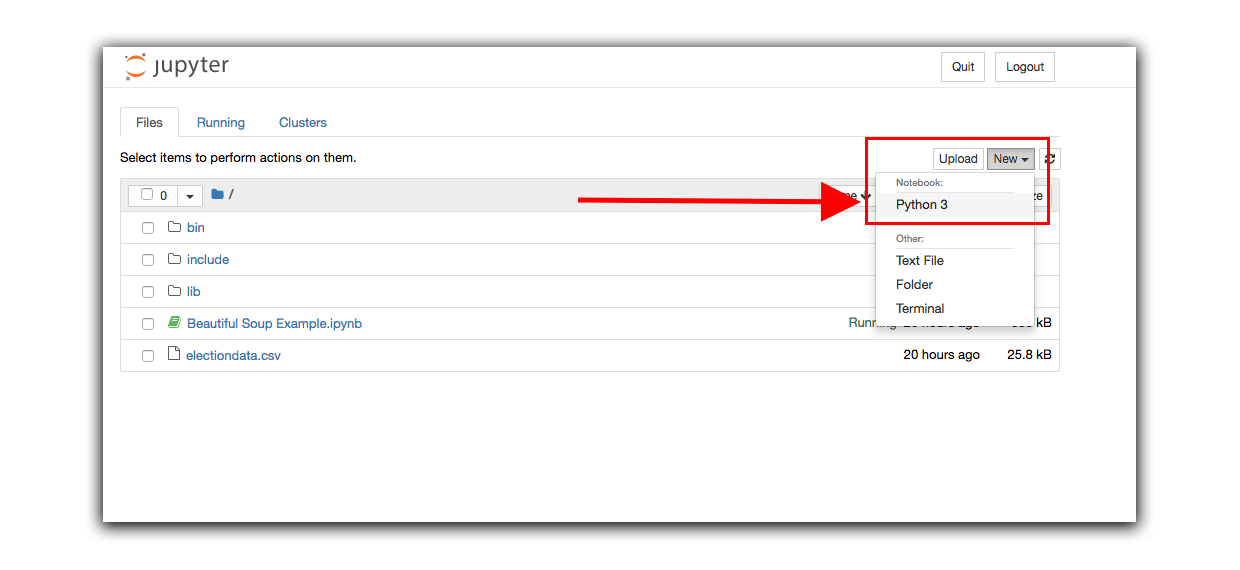
jupyter notebook
In the Ineractive environment, create a new Python3 notebook.
In our notebook, let’s import the libraries we’ll be using:
from bs4 import BeautifulSoup
import requests
import re
import numpy as np
import csv
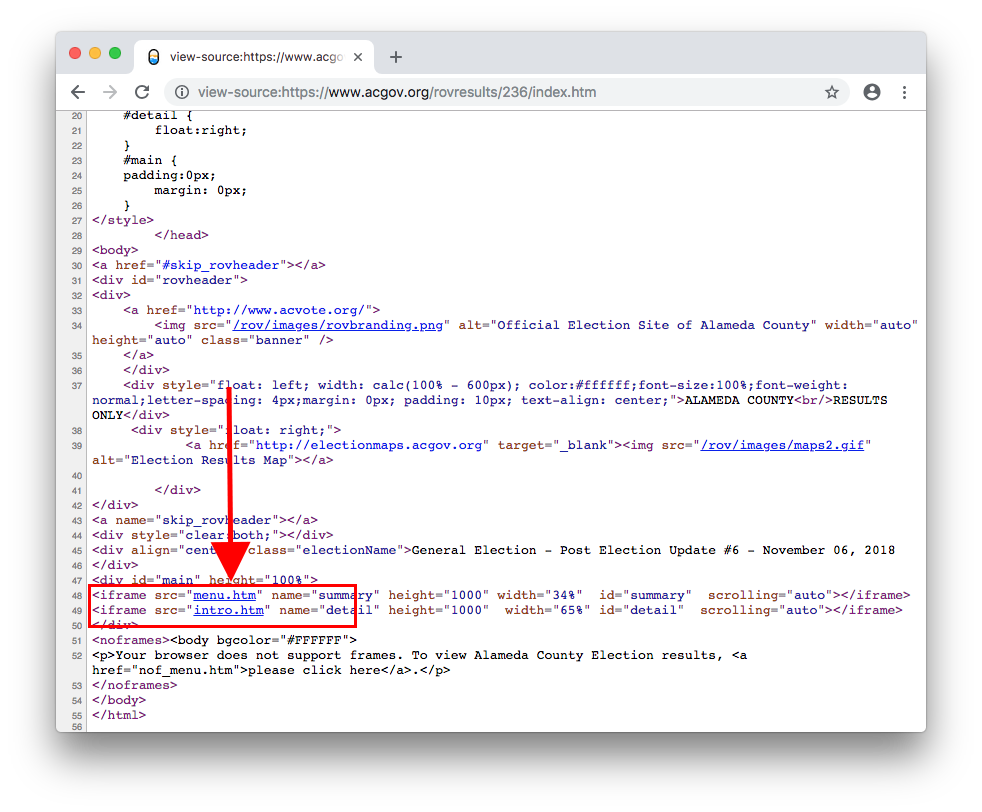
Next, we will visit the Alameda County Election Results page. We will scrape the results from this page using BeautifulSoup.
When we look at the source code of this webpage, we see that it’s made up of iframes.
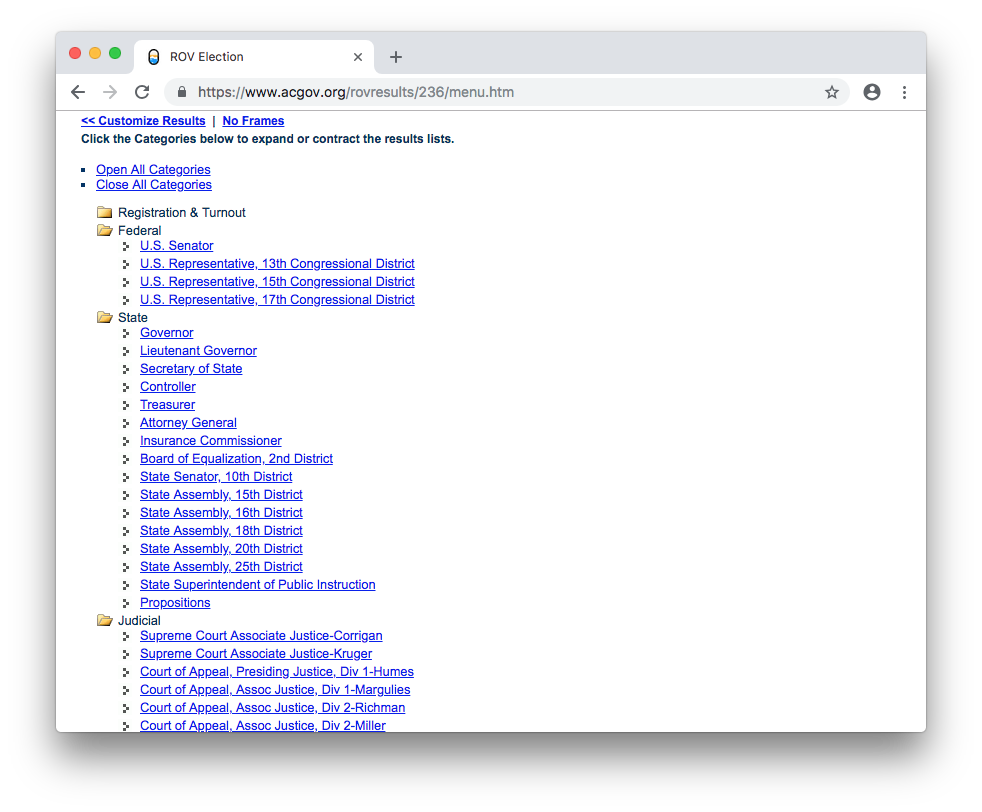
Visiting the menu.htm iframe, we can see that there is a page with links to each results section.
It would take a long time to visit every page and copy-and-paste the results. It would also be laborious for someone to do this on deadline, or during an election. But if we scrape the results, we can automate the process, and do it whenver we need fresh results.
In our Python notebook, let’s use the requests Python library to fetch this webpage:
result = requests.get("https://www.acgov.org/rovresults/236/menu.htm")
We can output the results of this requests by simply typing the variable:
result.content
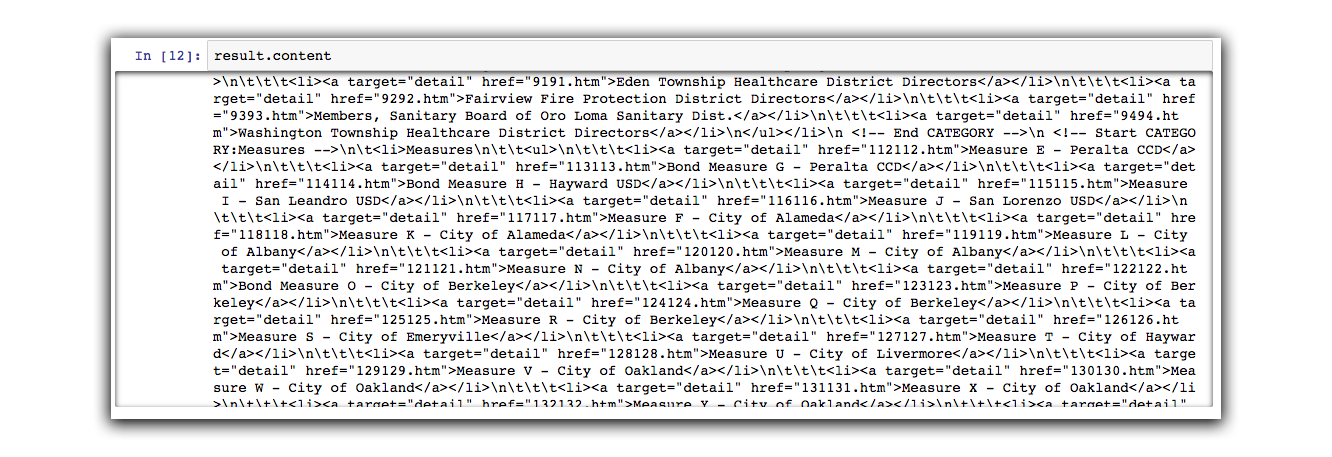
The output will show us a garbled mess. Let’s clean it up:
soup = BeautifulSoup(result.content)
soup
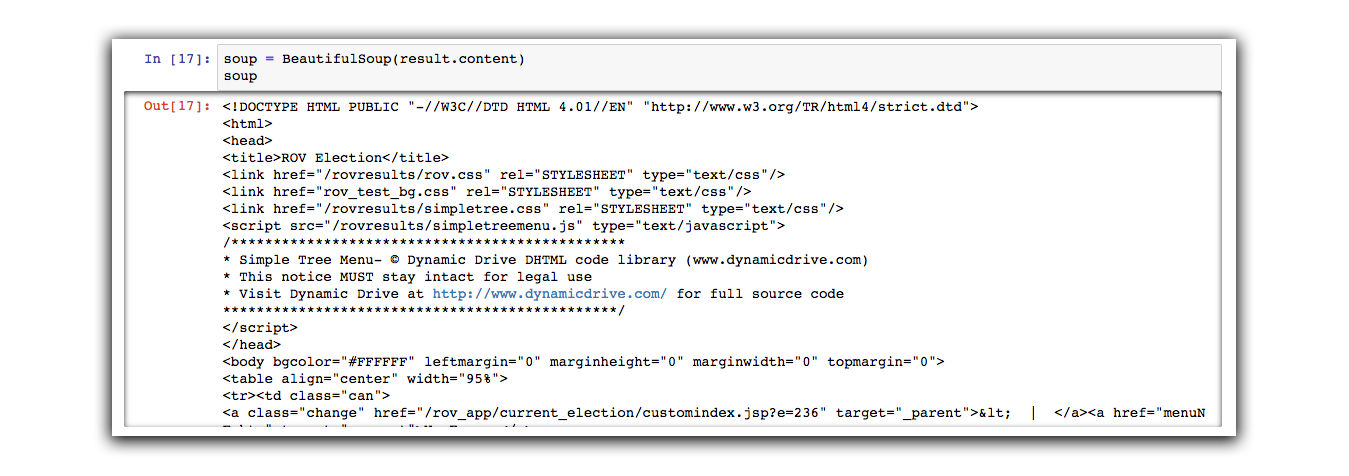
We can see that BeautifulSoup cleans up the document into a structured format.
Let’s find all of the “a” tags.
a_tags = soup.find_all("a")
a_tags
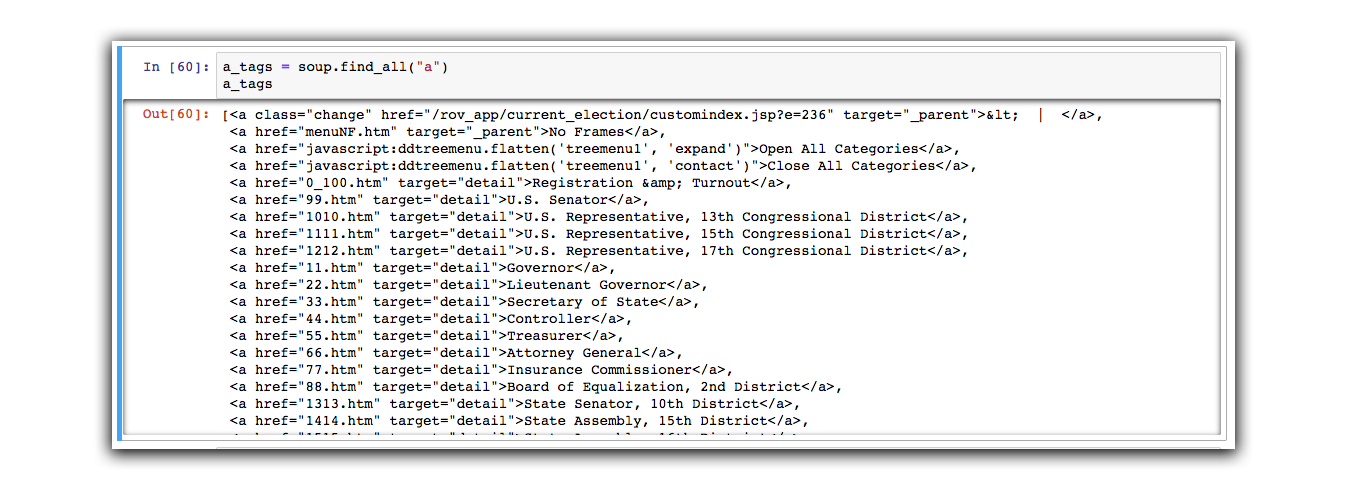
This will create a variable called a_tags that turns it into a type of array called a “list” in Python-speak. We can iterate through this lists variable using a for loop.
A Python “for loop” requires to pieces: the first is some variable we come up with (in this case, the singular word a_tag) and an array (in this case, the plural a_tags). Using plural and sinular nouns aren’t required by Python, but are typical practice.
The print() statement simply posts the output of these values so we can see them. It’s similar to when we type a variable with no other action in the earlier examples.
for a_tag in a_tags:
    print(a_tag['href'])
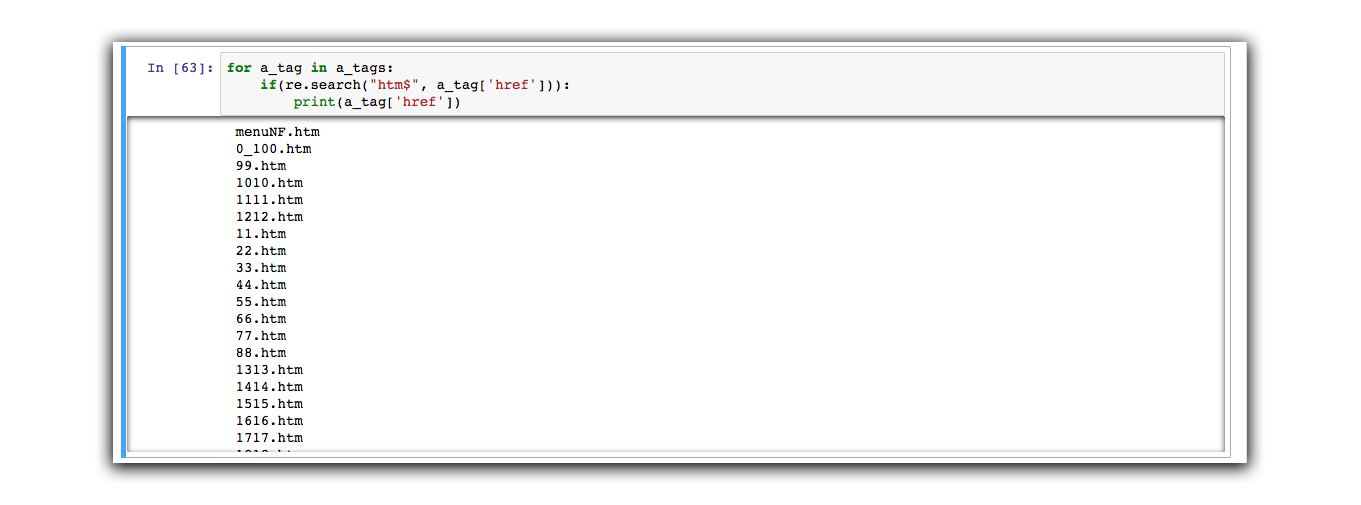
Now that we see we have a list of all of the links from the document, let’s fetch each document that ends in .htm and store in another array.
We will use the re command, which is short for RegEx to find only the files that end in .htm.
for a_tag in a_tags:
    if(re.search("htm$", a_tag['href'])):
        print(a_tag['href'])
Now that we’re sure this works, let’s go through and fetch each file that ends in .htm by using the requests.get() function.
# create an empty array to hold all of our files
files = []

# for each item in a_tags...
for a_tag in a_tags:

	# make sure it has htm at the end
    if(re.search("htm$", a_tag['href'])):

    	# use requests.get() to get the file
        file = requests.get("https://www.acgov.org/rovresults/236/" + a_tag['href'])

        # the append function attaches a new piece of data to the end of the array
        files.append(file.content)

# show files variable in the output
files
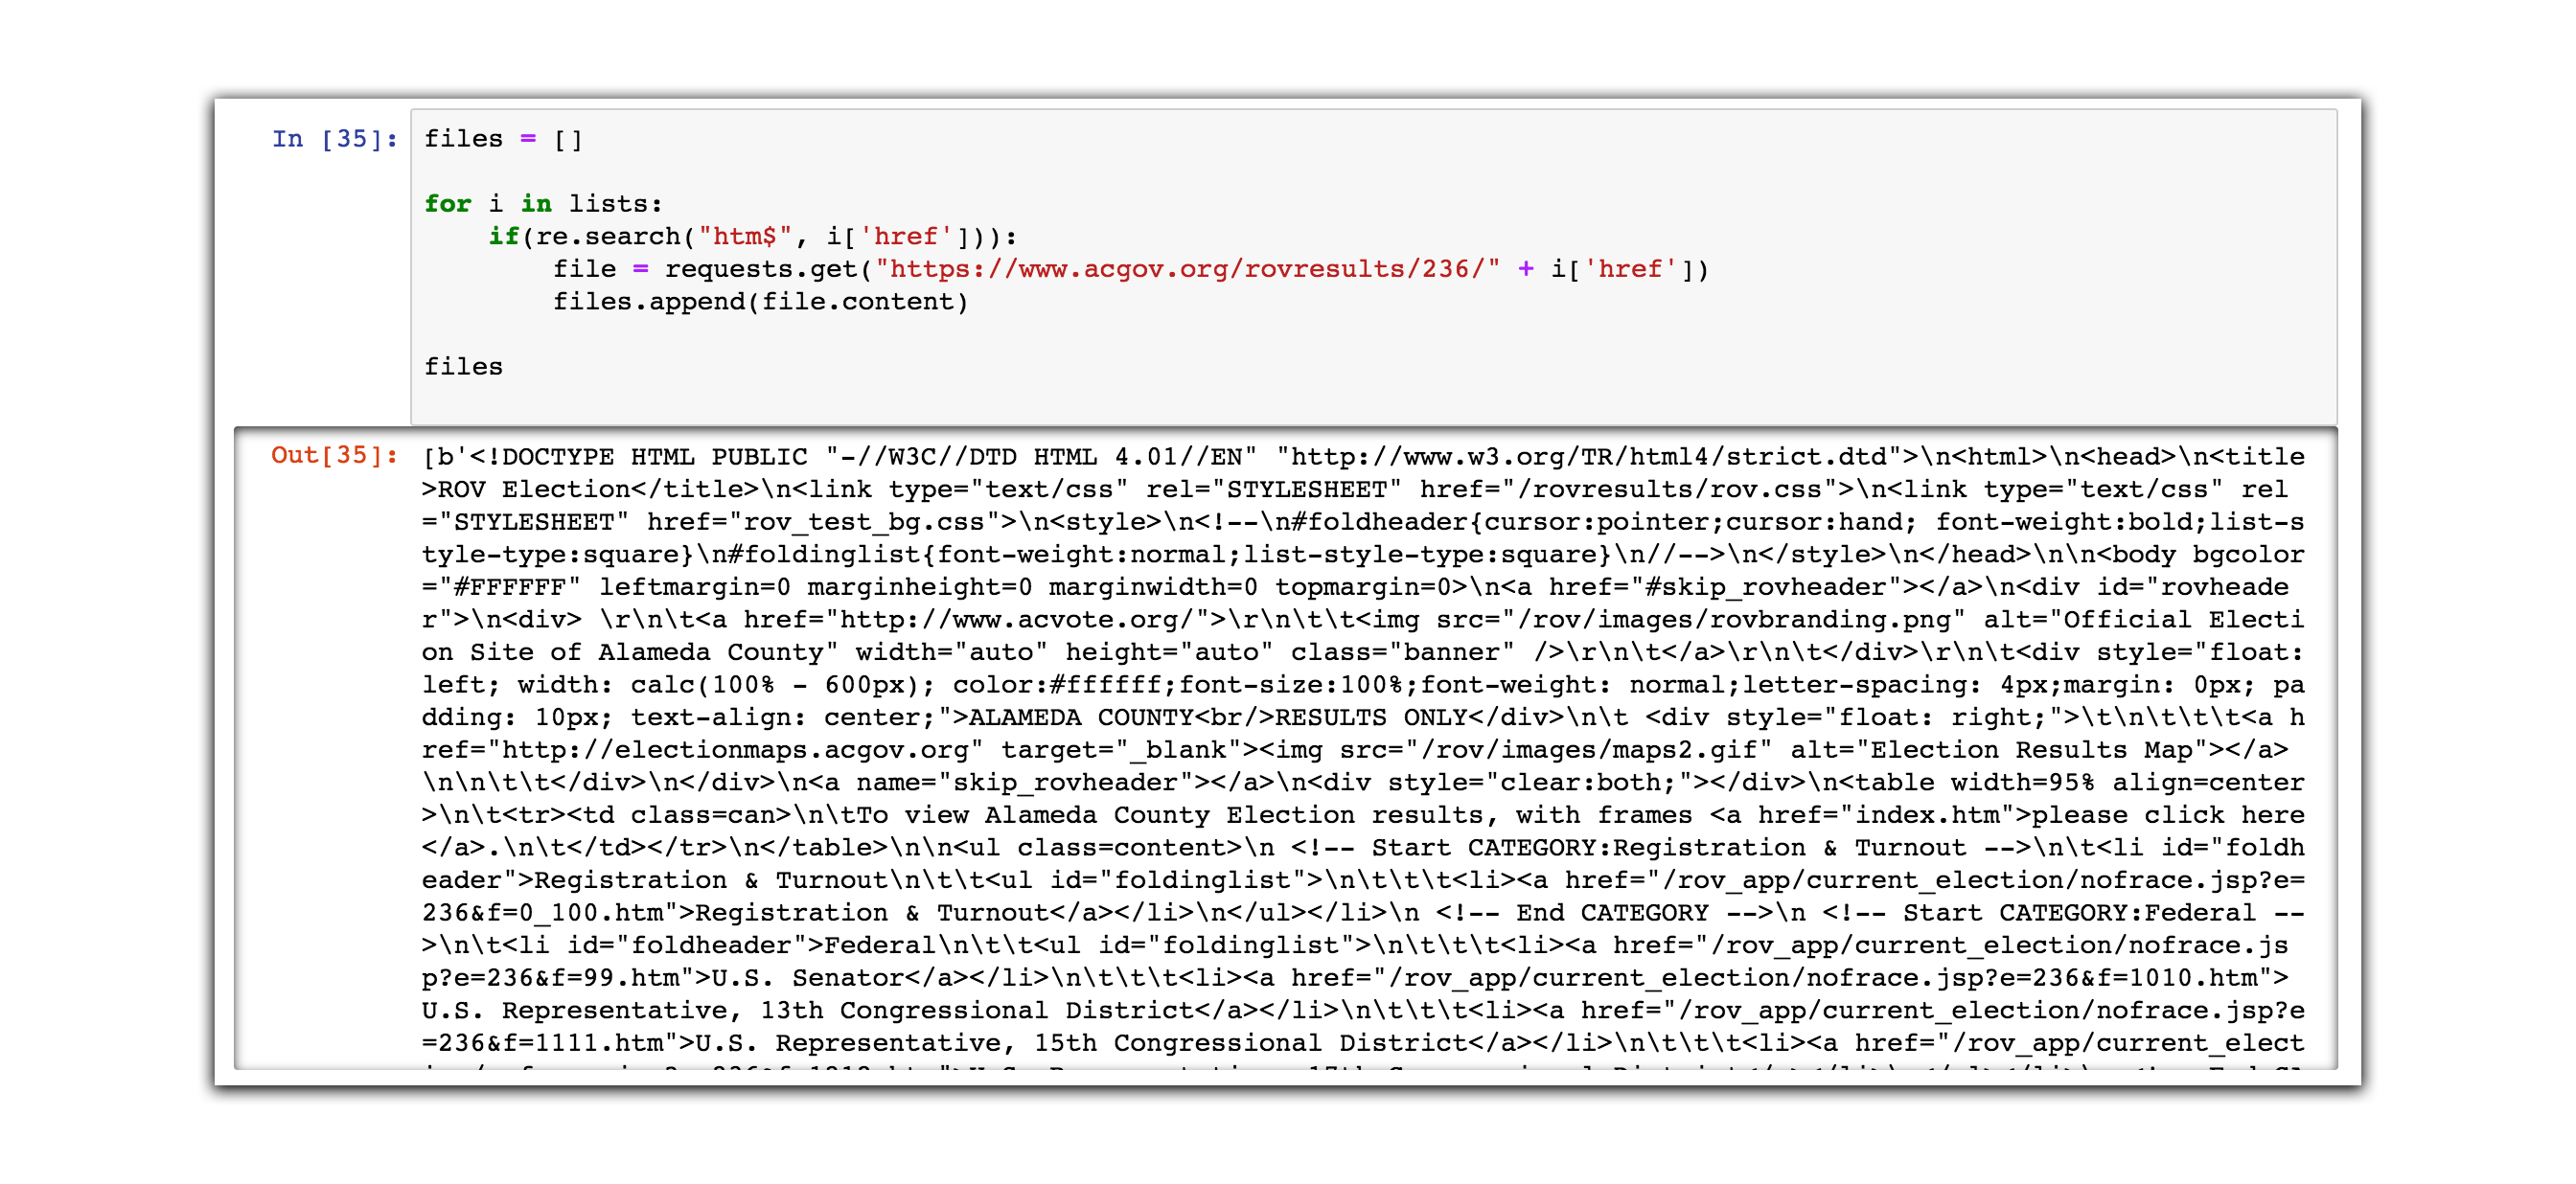
This command may take a while, because it’s fetching 133 separate html pages from the Alameda County Elections office website. In some cases, this command may also fail. Just try it again if it does.
We can see we now have an array called files that will store the source code of every page.
Let’s beautify each of these pages with another “for loop”.
for i in np.arange(0, len(files)):
    files[i] = BeautifulSoup(files[i])

# output files[0] just so we can see what the data looks like
files[0]
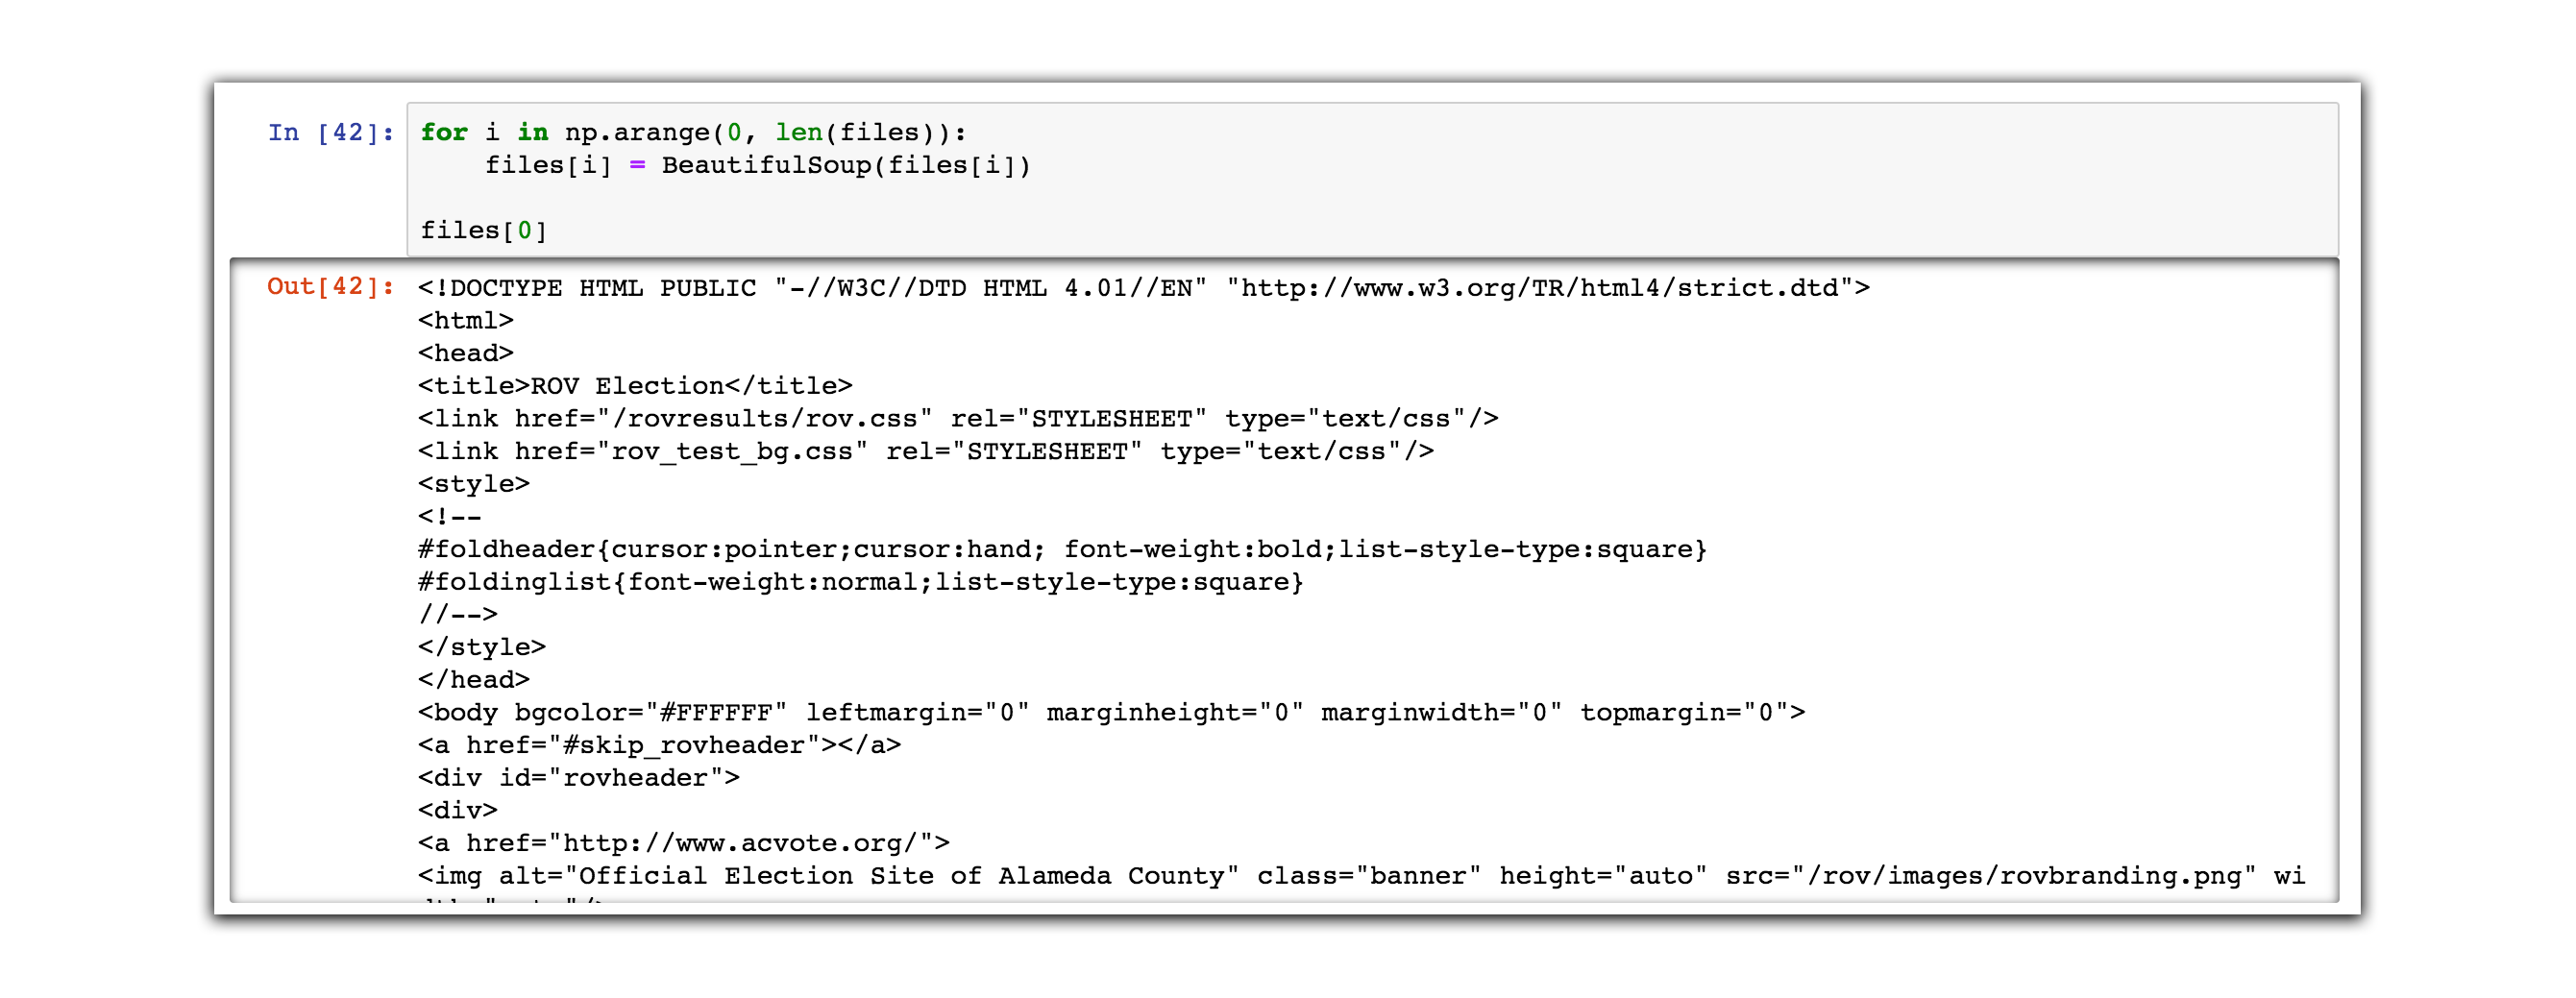
The last line just outputs the content of the first page.
Lastly, we are going to create a .csv file with each piece of data. Before we do, let’s understand how we can extract what we need from the document. If we analyze one of the pages:
files[5]
We can take a close look at the document structure. We see that the data is singified by certain class names can name (for candidate name) and can votes (representing how many votes the candidates got).
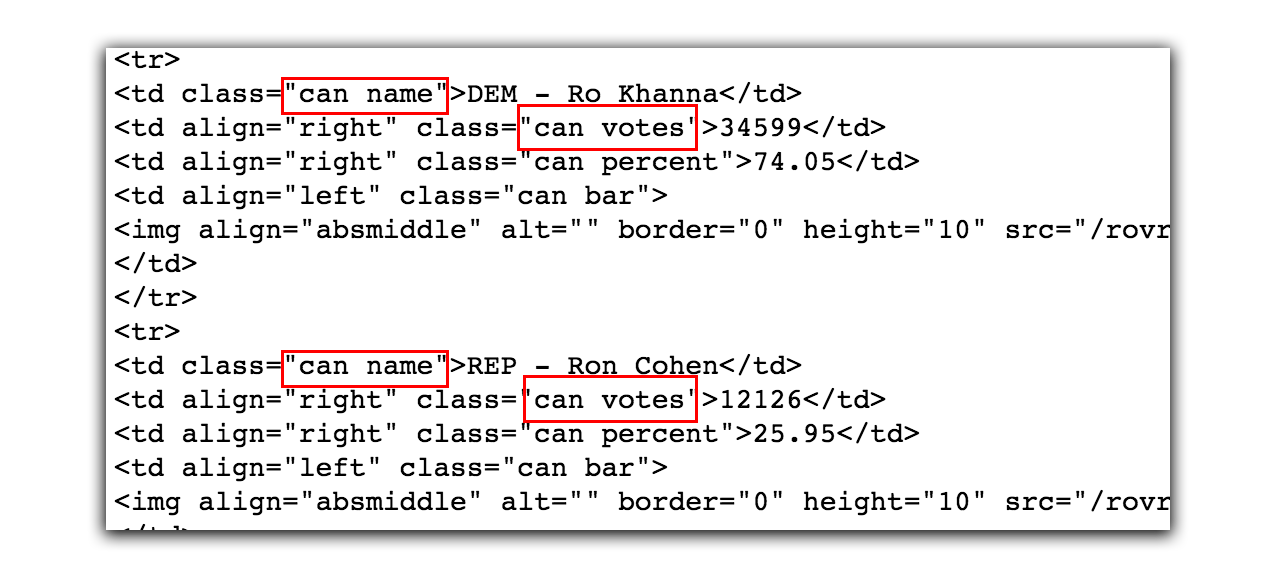
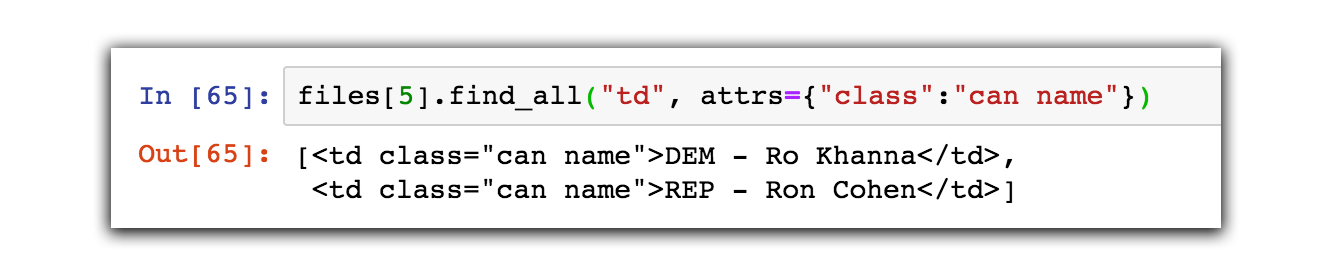
This will return an array of each “td” in the document that has a class attribute with value “can name”.
To extract a piece of data by its attribute using BeautifulSoup, we use the following notation:
files[5].find_all("td", attrs={"class":"can name"})
A quick note on “for loops” in Python. Python doesn’t have a native for-loop similar to the JavaScript for loop for(var i=0;i<n;i++) that cycles through numbers (indices). However, this can be accomplished using the format for i in np.arange(n): format. The np.arange(n) is a method of creating an array of numbers that looks like this [0, 1, 2, 3, 4... n] where in is how many numbers you want in the array. Then for i in np.arange(5): would be a for loop that cycles five times.
Given this information we want to create a “for loop” that satisties the following:
- Go through each file in the files array (
for file in files:) - Within each
file, go through the “can name” attributes. We can do this usingnp.arange(), which is a way to make
mycsv = ""
for file in files:
    for i in np.arange(len(file.find_all("td", attrs={"class":"can name"}))):
        mycsv += file.find_all("td", attrs={"class":"can name"})[i].contents[0] + "," + file.find_all("td", attrs={"class":"can votes"})[i].contents[0] + ","
        if file.find_all("td", attrs={"class":"raceName"}):
            mycsv += re.sub('\n', '', file.find_all("td", attrs={"class":"raceName"})[0].contents[0]) + ",\n"
        else:
            mycsv += ",\n"

print(mycsv)
and we write this output to a .csv file.
f = open('electiondata.csv', 'w')
f.write(mycsv)
f.close()